Sports
How to Start Running in Australia: A No-Nonsense Plan for Beginners

The honest short version
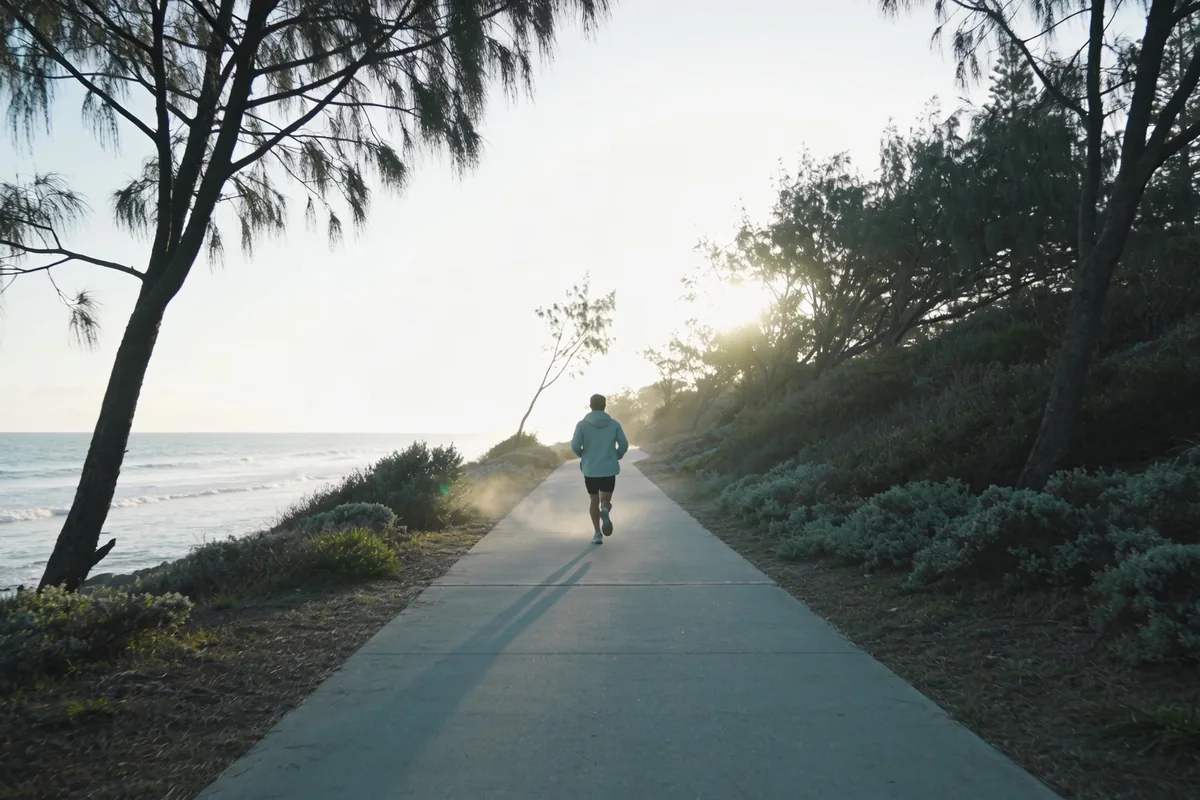
Here is what starting running actually takes. A pair of running shoes. Thirty minutes, three times a week. And a plan that mixes walking with running, so you are not expected to run non-stop from day one. That is the whole list. You do not need to be fit already, you do not need a gym, and you do not need to wait for spring. An Australian winter is a layering problem, not a season problem, and plenty of people start on a cold July morning.
What it costs is mostly nothing. Running shoes are the one real purchase. A proper first pair bought new from a specialist shop will sit somewhere in the range of $150 to $250 at the time of writing, and less if you catch a sale or buy last season’s model. Everything else, the shorts, the shirt, the jacket, you almost certainly already own.
One line of housekeeping before we go further. This is general health information, not medical advice. If you have a health condition, an old injury or any real doubt about whether running is safe for you, check with a doctor first. That is not a warning wall, just the same thing a sensible coach would tell you.
The mindset that runs through this guide is simple. Movement works best as an everyday habit rather than a project you start and abandon, which is the idea behind keeping up regular activities that boost your mental and physical health. Running is one of the easiest ways to build that habit, because it needs no equipment beyond shoes and no booking, just a front door and thirty spare minutes.
What starting running actually means
Here is the part most beginners get wrong. Starting running does not mean running non-stop from the first session. Nobody does that, and trying to is how most people quit inside a fortnight. What it actually means is walk-run intervals. You walk for a stretch, run for a stretch, and slowly lengthen the running bits as your body adapts. The walking is part of the plan, not a sign that you are failing at it.
Think of it as a ramp rather than a leap. In the first week you might run for a minute and walk for two, repeating that cycle for twenty minutes. A few weeks later the running stretches are longer and the walking ones shorter. Eventually the walk breaks shrink to nothing and you are simply running. How long that transition takes depends entirely on where you start. For some people it is weeks, for others a few months, and both are normal.
There are two free structures you can borrow so you do not have to invent the plan yourself. The first is the couch to 5k approach, a graduated walk-run schedule that aims to get you running five kilometres without stopping after roughly nine weeks. The second is parkrun, a free weekly five kilometre event held in parks and on paths across Australia every Saturday morning. Together they answer the two questions that stop beginners cold: what exactly do I do each session, and where do I even go.
Neither of these is a competition you have to win. A parkrun has walkers, it has people right at the back, and nobody finishes last because a tail walker stays behind the slowest person to make sure of it. The couch to 5k schedule is a guide rather than a contract, and you are allowed to repeat a week if it feels too hard. No one is timing you except you.
The gear you actually need (and what you do not)
Let us be direct about gear, because it is where beginners either overspend or talk themselves out of starting at all. You need exactly one real purchase, and that is running shoes. Everything else is optional, and most of it is noise.
Why the shoes matter. Running puts repeated impact through your feet, ankles, knees and hips, and a shoe built for it cushions that impact and supports your foot in ways a fashion sneaker does not. The right pair will not make you fast, but it will make the early weeks far more comfortable, and it is the single biggest thing you can do to avoid the beginner injuries that come from running in the wrong footwear.
What they cost, honestly. A decent new pair from a running shop sits roughly in the $150 to $250 range at the time of writing. You can spend more, but you do not need to, and you can spend less if you find last season’s model marked down. The thing worth paying for is the fitting, not the logo on the side.
That fitting is the step most people skip, and it is the one to keep. A specialist running store will measure your foot, watch you walk or jog, and recommend a shoe for your foot shape and the way you land. The fitting usually costs nothing extra if you buy from them, and it removes the guesswork that ends with a shoe that is too small, too narrow, or wrong for how you run.
Now the do-not list, because it saves you money and guilt. You do not need a GPS watch or a heart rate monitor. You do not need gels, energy chews or a special drink bottle, and you do not need compression gear. You do not even need a dedicated running outfit. A cotton t-shirt, shorts or track pants, and a light jacket will see you through all but the coldest mornings. The brands would love you to believe otherwise, but the only person who profits from that belief is the cashier.
One honest note to close the gear section. If you already own a comfortable pair of trainers and you are not sure whether running in them will hurt, you can start in those while you save for proper shoes. Just know that a shoe meant for walking does not have the cushioning for regular running, and that worn-out cushioning is exactly how knees and shins start complaining.
A gentle first four weeks
Here is a simple starting rhythm you can follow without an app, a coach or a printed plan. Run three days a week, with at least one rest day between sessions, and give every session the same shape: a five minute warm-up walk, then a cycle of running and walking, then a five minute cool-down walk.
The first month looks like this.
Week one: run for one minute, walk for two, and repeat that cycle until you have done about twenty minutes of moving time. That works out to six or seven run-walk cycles per session.
Week two: run for one and a half minutes, walk for two.
Week three: run for two minutes, walk for two.
Week four: run for three minutes, walk for two.
By the end of the month you are running more than you are walking, and you have built a base you can grow from. If any week feels too hard, repeat the week before it instead of pushing on. There is no medal for reaching a number faster, and nobody is checking your progress except you.
From here, the only number that matters is the ten percent rule. Do not increase your total running time by more than about ten percent a week. It is not a law carved in stone, it is a rough guard against the most common beginner mistake, which is doing too much too soon and getting hurt.
Pace is simpler than people make it. Run at a pace where you can hold a conversation. If you cannot string a sentence together without gasping, you are going too hard, so slow down or walk more. This is called the talk test, and it is the only pace guide a beginner needs. Most new runners go too fast because they assume running should feel like maximum effort.
Rest days are part of the plan, not a sign of weakness. Your body adapts to running while it rests, and both the soreness and the injury risk drop when you give yourself a day off between runs. On rest days you can walk, stretch gently, or do nothing at all.
Running through an Australian winter
Winter is honestly the easiest season to start in, because the heat is not trying to defeat you before you begin. A crisp July morning is far kinder to a beginner than a 35 degree January afternoon. The only real challenges are the cold, the shorter days, and in the north, the sun.
Dress for a cold morning in layers you can take off. A long-sleeve top under a light jacket is the standard formula, with a hat or light gloves if your ears and fingers complain. You will be cold for the first five minutes and warm after ten, which is exactly why layers beat one heavy coat. If you can peel a layer off and tie it around your waist, you have dressed correctly.
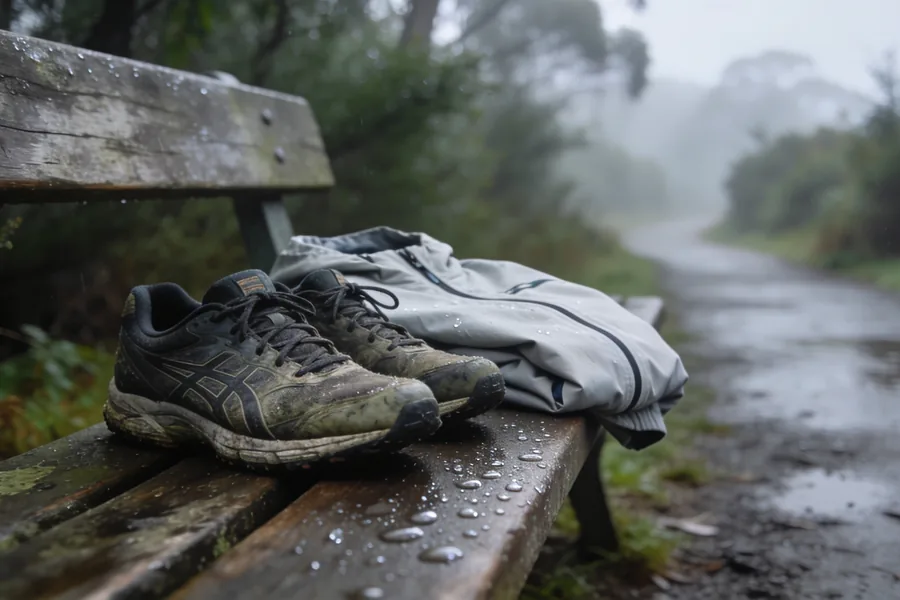
Warm up a little more deliberately when the temperature is low. Cold muscles are stiffer and more prone to strain, so give yourself an extra few minutes of walking or very gentle jogging before the run-walk cycles begin.
Daylight is the practical constraint of an Australian winter. In June and July the sun rises late and sets early, so most people run either in the middle of the day or under lights in the early morning or evening. A head torch or a reflective vest makes you visible to cars and costs very little. Run facing the traffic so you can see what is coming towards you.
One thing southern runners forget and northern runners should not. On a clear winter day the UV index can still climb, especially in the middle of the day, and especially the further north you live. If you run at lunchtime on a fine winter day, check the UV index for your suburb and wear sunscreen if it is at 3 or above. Sunburn in an Australian winter is a real thing, and a run should not end with you looking like a lobster.
Avoiding the beginner injuries
The beginner injuries all rhyme with each other. Shin splints, sore knees, tight calves and aching Achilles tendons. They sound like separate problems, but they share one cause: too much, too soon. The body is not used to the impact, the muscles and tendons are not ready for the load, and something complains until you listen.
The fixes are the causes in reverse. Build up slowly, which the ten percent rule covers. Take the rest days, which the weekly rhythm covers. And stop if something hurts sharply, rather than running through it and turning a small niggle into an injury that sidelines you for a month.
It helps to learn the difference between sore and injured. General muscle soreness the day after a run is normal, and it fades as you keep moving. Sharp pain during a run, pain on one side that will not settle, or pain that stops you running altogether, is different. That is your body telling you to back off, and the smart response is to listen early.
If a niggle does not settle after a few days of rest, get help rather than pushing through. Exercise physiologists and physiotherapists are the right early port of call for a running injury, because their job is working out what is actually wrong and giving you a plan to fix it. Seeing one early is cheaper and faster than limping in six weeks later on a knee you have been protecting the whole time.
The honest version of this whole section is short. Most beginner injuries are avoidable, and the way to avoid them is boring. Start small. Rest between runs. Do not be a hero about pain. The runners who get hurt are rarely the ones who went too slow.
Start smaller than you think
The habits that make running stick are not glamorous. A set time of day, so running becomes part of the routine instead of a decision you negotiate with yourself every morning. A local parkrun as a weekly anchor, because having a Saturday event on the calendar gives you a reason to keep the weekday sessions honest. A friend who runs with you, because it is much harder to skip a run when someone is waiting at the corner. And a goal that is about showing up, not about a finish time.
The one piece of advice to carry out of this guide is the title of this section. Start smaller than you think you need to. Almost every beginner who quits does so because they started too big, got sore or disheartened, and concluded that running was not for them. The runners who stay with it are the ones who started embarrassingly small and let the consistency do the building.
You do not need to announce it on social media, and you do not need a training plan printed and laminated. You need a pair of shoes, thirty minutes three times a week, and the willingness to run slower than feels impressive for the first few months.
In twelve weeks you will look back at the person who could not run for a minute without stopping, and you will be covering five kilometres without thinking about it. That person is not special. They just started smaller than they thought they needed to, and they kept going.
Sources:
- parkrun Australia, Free weekly 5km community events
- Sports Medicine Australia, Running and injury prevention
- Cancer Council Australia, Sun protection and the UV Index








Why everyone is suddenly talking about it
Picture the local rec centre on a Saturday morning. A court full of players, and they are not all the same age. There is a teenager warming up next to a grandparent, a couple of mates who look like they just rolled out of bed, and a group of women who have clearly been playing for years. Nobody is sprinting. Everyone is laughing. And you are standing on the sideline thinking, what exactly is this game?
That scene is repeating across Australia, and if you have felt the pull to find out what the fuss is about, you are not alone. This is a plain guide to pickleball: what it is, why it has taken off so quickly, and exactly how you can try it this week without any fuss. No club membership required, no special talent needed, and no gear to buy before you have even hit a ball.
What pickleball actually is
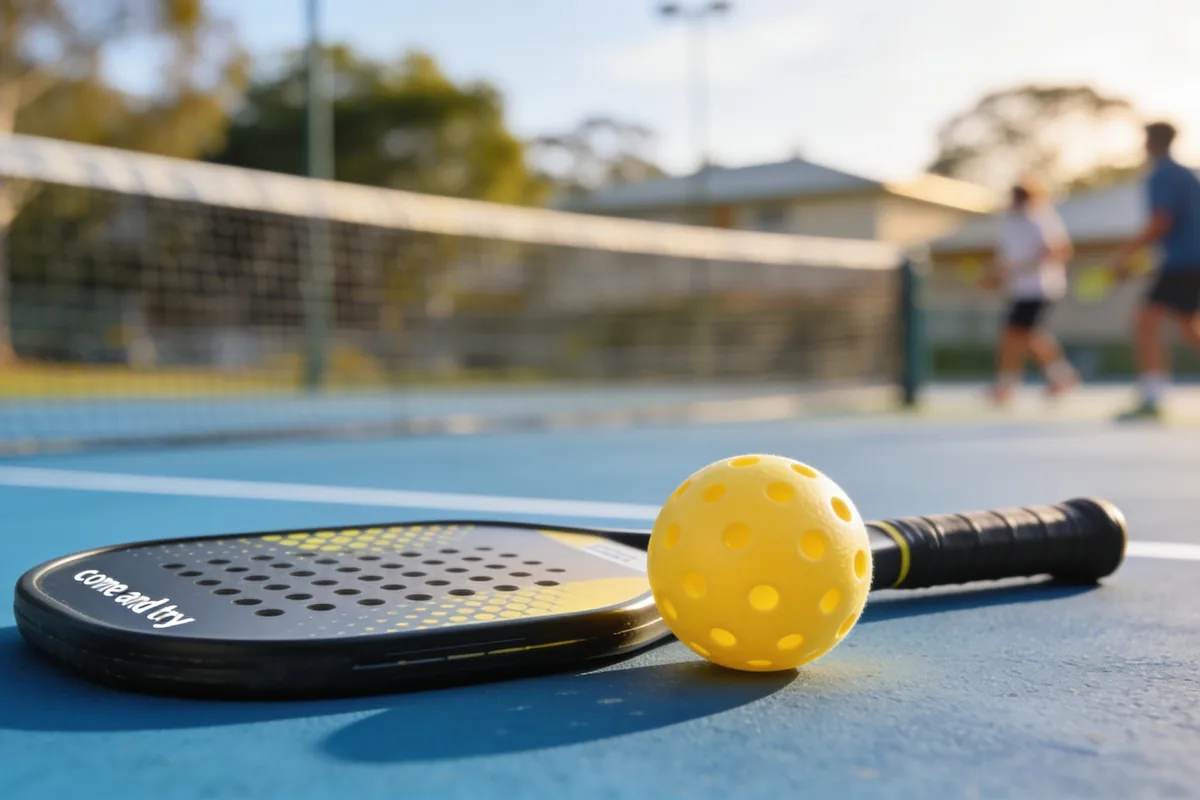
Pickleball is a paddle sport that sits somewhere between tennis, badminton and table tennis. You have probably seen the pictures: a court about a third of the size of a tennis court, a low net, solid paddles that look like oversized table tennis bats, and a plastic ball full of holes.
The ball is the thing people notice first. It is light, perforated and slower than a tennis ball, which is exactly why the game feels so forgiving. You have time to reach the ball, time to set your feet, time to actually think about where you are hitting it.
You can play singles or doubles, though doubles is where most people start and where most of the social fun happens. The court fits neatly into spaces that are too small for tennis, which is why so many councils have squeezed courts into existing parks and rec centres. And because the ball is light and the court is small, it works indoors and outdoors. Rainy day? Find an indoor court. Sunny Sunday? Head to the outdoor one. The game does not care.
If you are not a natural athlete, do not let that put you off. Pickleball rewards timing and placement over power, and a player who can place the ball calmly will beat a stronger player who swings wildly. That is part of why it appeals to such a wide mix of people. You do not need to be fit, young or coordinated to have a good game.
Why it got so popular, so fast
The growth has been hard to miss. Hundreds of thousands of Australians have now tried pickleball, and the participation surveys back up what your eyes are telling you at the local courts. But the real question is why it spread so fast, and the answer is simpler than the sport’s fans make it sound.
It is easy to learn. Most people can rally in their first session. Not play well, but play, which is a completely different thing and a much more enjoyable entry point. You are not spending your first month chasing the ball into the fence.
It is gentle on the body. There is far less running and impact than tennis, which makes it attractive to older players, people with dodgy knees, and anyone who has not exercised in a while. That low-impact quality is also why it suits people coming back from an injury and starting gently.
The games are short. A typical game runs to maybe twenty minutes, so you can play several in a session, have a chat between games, and still be home by lunchtime. Short games mean beginners are not stuck in a forty-minute slog with people far better than them.
And it is genuinely social. The court is small, the games are quick and the gaps between points are full of chatter. People talk to each other in a way they simply do not on a full-size tennis court. That social pull is the real engine of the sport’s growth, and it is the reason so many people come for the exercise and stay for the company.
The rules in plain words
The rules sound complicated until someone says them out loud, so here is the plain version. They vary slightly by venue, and the official rule book is the place to check details, but casual games are forgiving and nobody is going to referee you into the ground.
Serve underhand and diagonally. The serve has to go cross-court, like in tennis, and it must be hit underhand.
Then comes the two-bounce rule. After the serve, the ball has to bounce once on each side before anyone can volley it. So the receiver lets it bounce, returns it, the serving side lets that bounce, and only then can players start hitting the ball out of the air.
Stay out of the kitchen. The “kitchen” is the non-volley zone, the seven-foot area on each side of the net. You cannot step into it and volley the ball out of the air. You can stand in it, and you can hit the ball after it bounces, but no smashing it from close range.
The two-bounce rule exists for a reason. Without it, the serving team could rush the net and smash every return, and the game would be over in about four shots. Forcing the ball to bounce first gives the receiver time to get into the rally, which is why pickleball rallies last longer than you expect and why beginners get to actually play rather than just watch.
First to eleven wins, and you have to win by two. Simple as that.
That is the whole game. If you forget the details, the other players will remind you, cheerfully, because everyone was a beginner once and everyone remembers how it felt.
What you need to start (and what it costs)
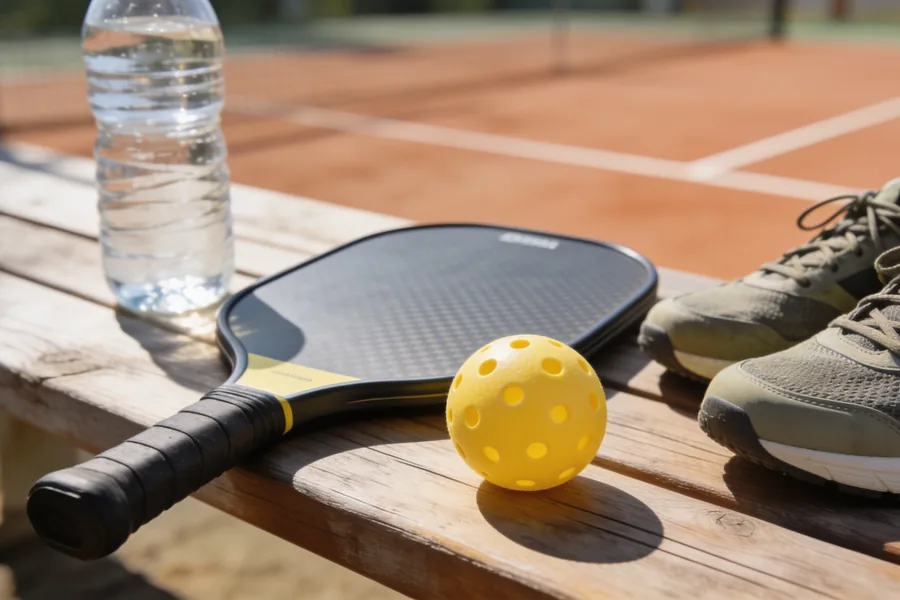
Here is the best news in this whole guide. You need three things: a paddle, a ball and comfortable shoes. That is it.
A paddle. Solid, lightweight and smaller than you expect. Paddles range from around $40 for a basic one up to a few hundred for the fancy carbon models, but a mid-range paddle in the $80 to $150 area will serve a beginner brilliantly for a long time. Do not buy the most expensive one on day one.
A ball. A few dollars. There are indoor balls and outdoor balls, and they behave slightly differently, but for your first game any proper pickleball will do.
Comfortable shoes. Not special pickleball shoes, just shoes you can move in. Court shoes or cross-trainers are ideal because they grip well and support sideways movement, but if you only have running shoes, wear those. You can upgrade later.
Here is the part most beginners do not know. Many venues lend paddles and balls for a first session, so you can try the sport before you spend a cent. That means your first game can cost nothing but your time, which removes every excuse. If you decide you love it, then you buy your own gear. If you do not, you have lost nothing.
How to find your first game
Finding a game is easier than you think, because the sport has spread through exactly the kind of places that are easy to find.
Check your state or territory association’s court finder. Pickleball associations across Australia keep lists of where the courts are and which venues run social sessions. A quick search will show you what is within a reasonable drive.
Ask your local rec centre or council. Community centres, leisure centres and councils have been among the fastest to add courts, and the staff will know whether there is a regular session and how to join.
Look for beginner nights. Most areas now run social sessions aimed squarely at newcomers, often in the evening or on weekends. These are the perfect entry point because everyone there is learning, and the regulars genuinely enjoy showing new people the game.
A couple of practical notes for your first visit. Many council courts are free to use if you bring your own gear, while rec-centre sessions usually charge a small fee that covers equipment hire. Wear something you can move in and bring a water bottle. Arrive a few minutes early so you can watch a game first and get a feel for the pace. And do not be shy about saying you are new. Every single player on that court had a first game, and the culture of the sport is built on welcoming the next beginner through the gate.
If it has been a while since you were active, or you are managing an old injury, start gently. A beginner session moves at a friendly pace, but your body still needs to adjust to a new sport. Mention that you are new and let the session leader know if you have any niggles. People are remarkably accommodating, because most of them were in your shoes not long ago.
One session is all it takes
Here is the honest truth about pickleball. One session is usually all it takes to decide whether it is for you, and for most people the answer is yes.
There is something about the combination, the easy learning curve, the short games, the chatter between points, that hooks people in a way other sports do not. You are not committing to a season or a membership. You are trying one Saturday morning, and letting the game make its own case.
And if it does hook you, you have just found a hobby that counts as the kind of small daily activity that boosts your mood and energy. Regular movement, a bit of competition and a social group all in one package is a rare combination, and it is exactly why the sport has stopped being a curiosity and started being a habit for so many Australians.
So do this. Find the nearest court, check for a beginner session, and book one game. Not a lesson plan, not a new outfit, just one game. Bring comfortable shoes and an open mind. If you are like most people who try it, you will be back the following week, and you will finally understand what all the fuss was about.
Sources:
- Pickleball Australia Association, Getting started and rules
- Australian Sports Commission, AusPlay, Sport participation
- Australian Institute of Sport, Being active at any age

Food Waste in Australia: Why Your Veggies Die Early and How to Stop It

How to Declutter Your Wardrobe Without Losing the Clothes You Love

School Refusal in Australia: A Calm Guide for Parents When Your Child Won’t Go

The Science Behind Melbourne’s Unpredictable Climate: What’s Really Going On?

Plastic-Free Coffee Makers: Myth or Must-Have?

Zero Waste Toothpaste: What’s Worth the Switch and What to Look For
-
 Melbourne1 year ago
The Science Behind Melbourne’s Unpredictable Climate: What’s Really Going On?
-
Eco Friendly4 years ago
Plastic-Free Coffee Makers: Myth or Must-Have?
-
Eco Friendly4 years ago
Zero Waste Toothpaste: What’s Worth the Switch and What to Look For
-
 Eco Friendly4 years ago
Plastic Free Packaging: How to Keep Your Business Plastic Free
-
 Eco Friendly4 years ago
How Aussie Businesses Can Reduce Plastic Pollution
-
 Food1 year ago
The 9 Best Foods and Drinks to Enjoy Before Bed for Restful Sleep
-

 Automotive1 year ago
Wet Weather Tyres in Australia: What to Look For and When to Replace Them
-

 Eco Friendly1 year ago
Eco-Friendly Food Wrapping: Safe Papers for Sustainable Living