
Home & Garden
Moving House Checklist Australia: A Week-by-Week Plan That Misses Nothing

Nobody plans to forget the change of address. It just happens. The lease is signed, the boxes multiply, and somewhere between the removalist quote and the utility connections the plan starts leaking. Most moves are not ruined by the heavy lifting. They are undone by the small admin tasks that slip away in the weeks before, one quiet email at a time.
Underneath all of it is one worry, and it is not the lifting. It is the forgetting, and the forgetting is what costs money and sleep. The bill that follows you to an old address. The bond money held up because you never took the move-in photo. The first night spent hunting for a phone charger in a box you cannot find. So here is the reassurance, stated plainly: a move is a project with a timeline, not one chaotic day. Work the timeline below and the planner that comes with it, and you will not drop the things that matter.
Your move planner
Fill it in as you read, then copy it to keep.
6 to 8 weeks out
2 to 3 weeks out
1 week out
Moving day
Government
Money
Health and school
The quiet ones
Six to eight weeks out: decisions, not boxes
The early window is about choices, not packing, and the first choice is the removalist. Good removalists book out, especially for weekends and school holidays, so start there rather than leaving it to the last fortnight. Ask for at least two or three written quotes rather than settling for one, and compare what each quote actually covers. Insurance is the detail most people skip: what happens if the sofa gets scratched or the fridge loses a door, and who is liable. A binding quote in writing is worth more than a friendly estimate over the phone.
When you compare quotes, compare like with like. One removalist may quote a flat price for the whole job while another quotes an hourly rate plus a call-out fee, and the difference only shows up once the truck is loaded and the clock is running. Ask each one what the figure includes: packing materials, the drive between the two homes, stairs and a long carry at either end, and whether GST is on top. Those are the places an estimate quietly grows.
Be alert to operators who do not behave like a proper business. There are unverified brokers in the moving space who ask for unusual payment methods or push you to decide on the spot, and a legitimate removalist does not need either. If a quote arrives and the pressure arrives with it, that is a reason to slow down, not speed up.
Then start the declutter. A move is the easiest time to let things go, because everything you keep has to be packed, carried, unpacked and stored. Work through the rooms you use least first, and let the items you no longer need go to donation or sale before the move, so you never pay to transport them. The method is the same letting-go skill applied one drawer at a time, and my guide to decluttering your wardrobe without losing the clothes you love walks through how to sort without regret.
Two to three weeks out: the notification window
This is the practical fortnight, and it is where most of the “who do I tell” work happens.
Tell the landlord or agent that you are leaving, and check what the lease needs from you, including the notice period and the expected condition of the property on handover. Arrange the utility disconnections at the old place and the connections at the new one: electricity, gas, water and internet. Each provider runs on its own timeline, so the disconnections and connections are separate jobs, not one phone call. Book the NBN connection early enough that a technician visit, if one is needed, lands before you do, because a new home without internet is a very long first week. Tell each provider your move date and the new address, and ask for the final bill to be sent by email or to the new place, so it does not land at a house you have left. If more than one name is on the bills, put every name on the change, so the mail stops following all of you at once.
If you are moving out of an apartment, book the lift with the building manager and check any loading restrictions, because that is the kind of detail that only matters on moving day and only causes chaos then.
And set up Australia Post mail redirection. Most sources recommend three to six months, so no bill, renewal or card slips through after you have left. It is a small cost set against the price of a missed statement or a fine that went to the wrong address.
One week out: the first-night box and the labels
The packing rules that save the move are simple, and they all come back to one idea: the first night should not require archaeology.
Pack one clearly labelled first-night box with bedding, toiletries, phone chargers, a change of clothes, medication, snacks, a kettle and a mug. If you have kids or pets, add what they need for that first night too, because they will be tired and so will you. Carry that box in the car, not the truck, so it is with you the moment the door opens. Add basic tools, toilet paper, bin bags and a first-aid kit, and do not be shy about overpacking it. Everything in the truck can wait until morning, and the box in the car is what gets you through the night.
Label every other box by room, because a labelled box lands in the right room and an unlabelled one lands in a pile that takes a week to sort. Keep heavy things in small boxes, since a small box of books is liftable and a large one is a back injury waiting to happen. Arrange moving-day access and any parking permits you need at both ends, and book the end-of-lease clean if you are having one done.
Moving day: meters, keys and the record
On the day itself, the practical tasks matter more than the order of the furniture, so do them before you get swept up in the carrying.
Read and photograph the electricity, gas and water meters at both ends. That gives you the facts for the final bills at the old place and the first bills at the new one, and it settles arguments before they start. Take the move-in photo and video record room by room, before you put anything down. For renters this is the standard protection for the bond in every state, because it is the “before” that gets compared with the “after” when the lease ends.
Do a final walkthrough of the old place once the truck is loaded, checking cupboards and drawers and the backs of doors. Then return the keys, remotes and fobs. If you cannot hand the keys over in person, arrange with the agent or the new occupant where they will be left, and put it in writing so there is no confusion later. And when you reach the new place, set the bed up first, so the day ends in one finished room rather than a corridor of boxes.
If you are moving into an apartment, the choosing side and the settling-in side are two halves of one decision. My guide to apartment living in Australia and what to consider before you choose is written for renters weighing the trade-offs, and it is worth a skim now that you are on the other side of that choice.
The first week: the change-of-address long tail
The list everyone forgets is the long tail, and it is easiest to work through in groups.
Government first. That means myGov and the ATO, Medicare and Centrelink, the electoral roll, and your driver’s licence and vehicle registration. Most states ask you to update those within a few months of moving, and your state transport authority sets the exact window, so check that rather than guessing. If you receive payments or concessions from Centrelink, updating your address protects them, because a letter sent to the old address can stall something that matters.
Then money. Your bank and credit cards, your superannuation, and your insurance policies all need the new address, because a renewal notice sent to the old one is how cover lapses quietly.
Health and school come next. Tell your GP, dentist and pharmacy, and, if you have children, the school or childcare centre. Tell your employer as well, for the payroll address if nothing else.
And then the quiet ones, the ones that keep the old address alive for years: pet microchip and council registration, subscriptions, delivery apps, loyalty programs, and any charities you donate to. If you get regular deliveries, from groceries to medication, update those accounts as well, because a parcel sent to the old address is harder to chase than a letter. Each of these takes two minutes online, and each one is a piece of mail or a package that stops following you around.
The bond thread for renters
For renters, the bond runs through the whole move, so keep the thread in your hand from the first inspection to the last. Keep the bond lodgement details from when you moved in, because you will need the reference when it is time to claim it back. If the property came with an entry condition report, hold onto that as well, because it is the baseline your move-out photos get compared with.
Photograph everything when you move in and again when you move out. The comparison between the two sets of photos is the standard used to settle bond disputes in every state, so the ten minutes it takes on each day is cheap insurance.
Know where the bond is actually held. In most states it is lodged with the residential tenancy authority rather than sitting in the agent’s account, and it is released through that authority once the paperwork is sorted. Do the end-of-lease clean properly, return the keys on time and give the property the same once-over you gave it when you arrived. The exact rules and timeframes differ by state, so your own state’s residential tenancy authority is the place to confirm them, not a general guide like this one.
The money honesty
Moving costs more than the removalist. There are connection fees at the new place, a professional clean if you pay for one, the first grocery shop for a pantry that starts empty, and the takeaway on night one because the kettle is packed and you are exhausted.
The honest note is to build the budget before you get the quote, not after. Get the removalist quote in writing, ask what happens if the job runs over the estimate, and ask whether the figure includes GST, a long carry and both ends of the trip, because those line items are where a moving bill grows past the number on the page. And keep a line in the budget for the things that will not occur to you until they happen. The written checklist is a budget tool as much as a task list, because the items people forget to budget for are the same items the checklist reminds them to arrange.
A move is a project, not a single day
No one remembers a move. That is not a personal failing. It is simply how a long list of small tasks behaves, and it is exactly why a written plan wins every time.
Fill the planner in once as you read this, run it again the week before you move, and let it catch the thing you would have forgotten. The project has a timeline, the timeline has the tasks, and the tasks are all in front of you now. Work through them and the forgetting stops costing you sleep.
Sources:
- ASIC Moneysmart – moving house and the costs to budget
- Australia Post – mail redirection when you move
- NSW Fair Trading / your state residential tenancy authority – rental bonds





The honest short version
If you have killed a houseplant, or three, this guide is for you. Here is the secret that changes everything: most houseplants do not die from too little light. They die from too much water. The number one killer of indoor plants is a kind, well-meaning owner watering them more often than they need.
The second thing to know is what “low light” actually means. It does not mean a dark room with no windows. It means a bright room where the plant sits a few metres back from the window, or a north or east facing spot. If the room you want to fill has a window at all, something can almost certainly live in it.
So the beginner method is simple. Start with two or three hardy plants. Learn to check the soil with your finger before you water, instead of watering on a fixed schedule. Then leave them alone a little more than feels natural. That is most of it.
One honest note before the detail. This is general gardening information, and plants are living things with their own preferences. Words like “most plants”, “can” and “some varieties” are doing real work here. If a particular plant is struggling, the variety and your specific room matter.
Why indoor plants die (and it is rarely your fault)
Before you blame yourself, know this. Killing a few houseplants is not a personal failing. It is the standard entry fee for learning to keep them, and almost everyone who is now good with plants has a graveyard of early victims behind them.
Most people are simply never taught how. The instructions that come with a plant are usually a plastic tag that says “water regularly”, which is almost designed to be misunderstood. Read literally, water regularly means water often. And watering often is exactly what kills most indoor plants.
Overwatering is the biggest killer. When a plant sits in soil that stays wet, the roots cannot breathe. They rot, and the plant dies from the bottom up. The classic story is the person who waters every few days to be safe, then wonders why the leaves go yellow and mushy.
The second killer is no drainage. A pot with no hole in the bottom collects a pool of water under the soil, and the roots sit in it permanently. Even a plant that copes with normal watering will drown in a pot with nowhere for the water to escape.
The third is a genuinely dark spot. Some plants tolerate low light, but none thrives in a room with no natural light at all. A plant in a windowless corner or a hallway that never sees daylight is slowly starving, and no amount of water will fix that.
What “low light” really means
Let us translate the jargon, because the plant world uses “low light” in a way that confuses beginners. A plant labelled low light does not want a cave. It wants less light than a sun-loving plant, which is a very different thing. The label compares it to other plants, not to your darkest room.
In plain terms, low light means one of two spots. A bright room where the plant sits a few metres back from the window, out of the direct sun. Or a north or east facing windowsill, which gets gentle morning light rather than the harsh afternoon sun of a west facing window.
The honest limit is this. A room with no window at all is not low light, it is no light, and even the hardiest plants will struggle there long term. A bathroom or hallway with a small window works, as does a room with a skylight. A completely windowless room does not, and no plant recommendation in this guide changes that.
How do you judge a spot with your own eyes? Use the book test. Stand where you want to put the plant and try to read a book comfortably in the middle of the day. If you can read without switching on a light, the spot has enough light for a low-light plant. If you cannot, look for somewhere closer to a window.
This is why people put plants in the wrong spot and then blame themselves or the plant. And if you are in an apartment working out which rooms and windows suit what, the questions in our guide to apartment living in Australia are worth thinking through before you fill a room with greenery.
The easiest plants to start with
Here are six forgiving plants that tolerate lower light. Common names only, no Latin required. Each gets a plain description, why it is forgiving, and the one thing it cannot handle. Pick two or three that appeal.
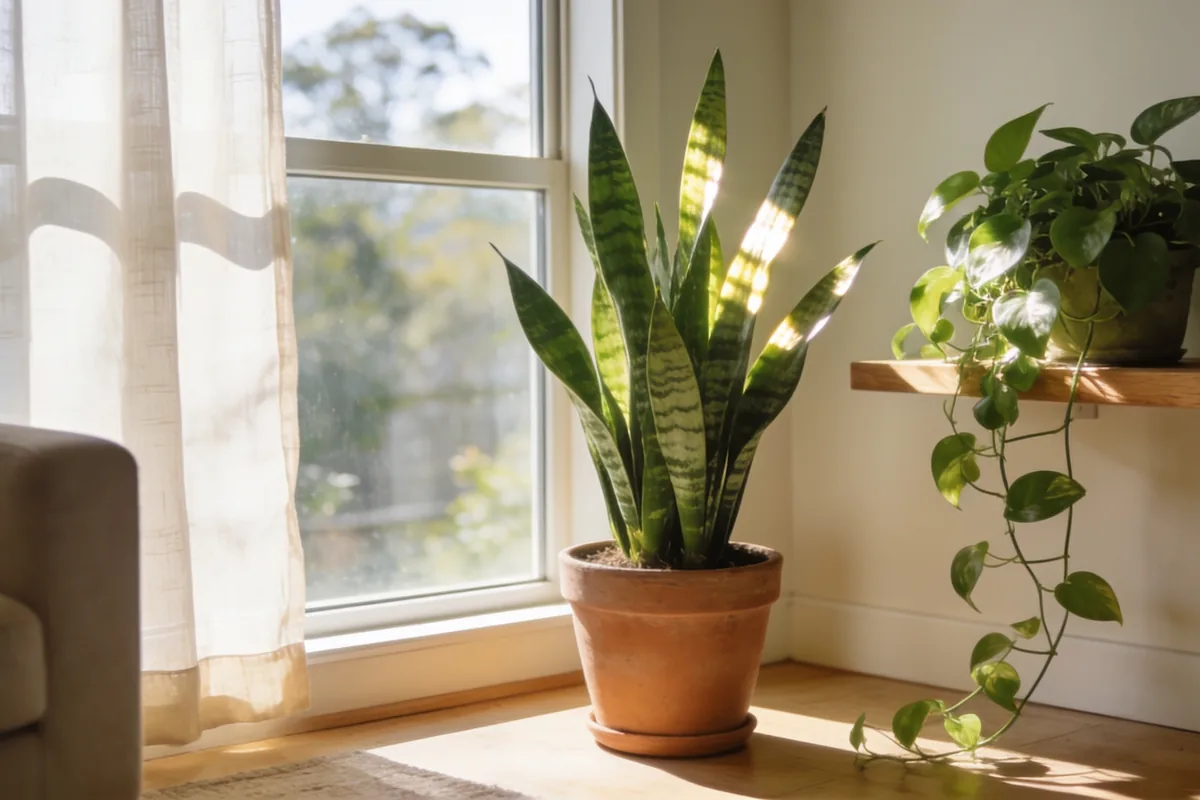
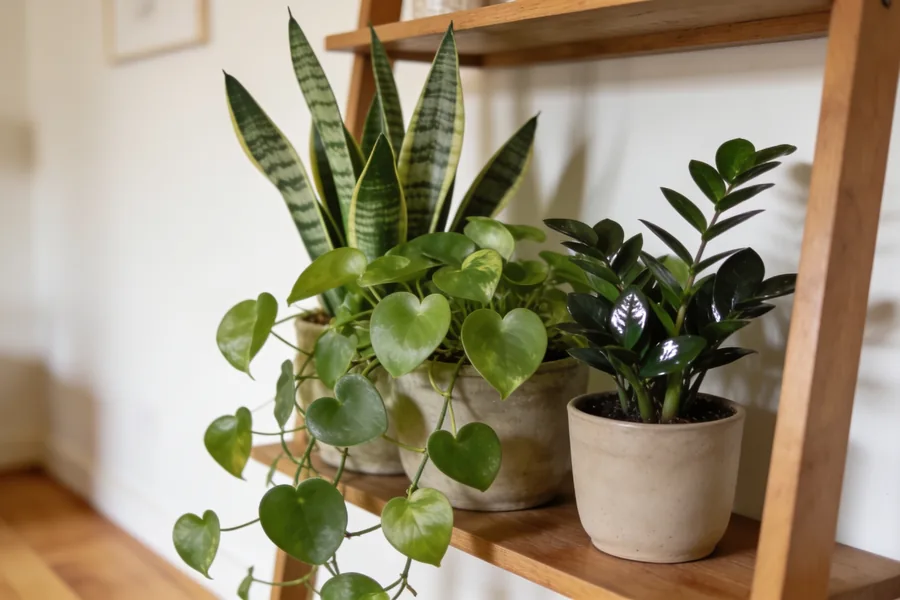
Snake plant. Tall, stiff, sword-shaped leaves that grow upwards, often edged in yellow or patterned in a darker green. It is famously tough, tolerates low light and irregular watering, and it will wait for you while you travel. The one thing it cannot tolerate is soggy soil, so let it dry out completely between waters.
Pothos. A trailing vine with heart-shaped leaves, usually green or variegated with cream and yellow. It grows happily in low light and tells you when it is thirsty: the leaves droop, you water, and within hours they perk back up. That makes it the most forgiving plant on this list for learning to read what a plant needs. The one thing it cannot tolerate is sitting in standing water, which rots the roots.
ZZ plant. Glossy, dark green, slightly waxy leaves along upright stems. It is almost absurdly tolerant of low light, neglect and irregular watering, which is why it appears on every unkillable plant list. The one thing it cannot tolerate is overwatering. It would rather be forgotten for a month than watered every week.
Spider plant. Long, slender, arching leaves, green with a white or cream stripe down the middle. It is forgiving and grows quickly, sending out baby plants on trailing stems that you can pot up and give away. The one thing it cannot tolerate is being left bone dry for too long, so it likes slightly more regular water than the snake or the ZZ.
Peace lily. Broad, dark green leaves and white flowers that look a little like a calla lily. It is a drama queen in the best way: it droops dramatically when thirsty and revives within hours of a drink, which makes it an excellent teacher for a beginner. The one thing it cannot tolerate is being left to wilt repeatedly.
Philodendron. Heart-shaped leaves on a plant that can trail or climb, usually a rich green. It is forgiving, grows well in low to medium light, and is often confused with pothos, which is fine, because the two have very similar temperaments. The one thing it cannot tolerate is cold draughts and soggy roots.
Start with two or three of these rather than filling a windowsill on day one. Fewer plants means less to learn at once, and the confidence from keeping three alive beats the guilt of killing eight.
Watering without guessing
Watering is where beginners either kill their plants or worry themselves into killing them, so here is a method that removes the guesswork. Use your finger.
Push a finger into the soil up to about the second knuckle. If the top couple of centimetres feel dry, it is time to water. If they still feel damp, wait. That is the whole test. Plants do not drink on a schedule. They drink when they are dry, and your finger tells you when that is.
A simple water-when, do-not-water-when check helps at the start. Water when the top of the soil is dry to the touch, when the pot feels noticeably lighter, and when the plant is in its growing season. Do not water when the soil is still damp an inch down, when the pot still feels heavy, or when it is mid-winter and the plant has slowed down.
Drainage matters more than most people realise. Water until it runs out of the bottom of the pot, which tells you the whole root ball is wet. Then let it drain and empty the saucer, so the pot is not sitting in a puddle. A plant in a decorative pot with no hole should be taken to the sink, watered, drained, and returned.
The winter rule deserves its own paragraph. Between roughly June and August, most indoor plants grow much more slowly, which means they drink far less. Ease right off the watering, often to half as often or less, and stop fertilising until spring. A plant that needed water every five days in summer might need it only every ten or twelve in winter.
If you have already overwatered a plant, here is the rescue in plain steps. Stop watering it immediately. Let the soil dry out completely, which can take a week or more. If the roots are mushy or the pot smells rotten, repot into fresh, dry potting mix and trim away the soft roots. Then resist the urge to water it to help it settle. Give it a bright spot and let it recover on its own.
Light, warmth and the winter slowdown
An Australian winter changes things for indoor plants, and knowing how keeps you from panicking when a plant that thrived in March starts looking quiet in July. The plant is not dying. It is resting.
The days get shorter and the sun sits lower in the sky, so even a spot that was bright in summer gets noticeably less light in winter, and the plant responds by slowing its growth. Growth slows, the plant needs less of everything, and the leaves may look the same while the roots do very little.
What it needs less of is water and fertiliser. A plant that is not growing is not drinking much, so the finger test becomes even more important, because the soil stays damp for longer between waters. And fertiliser in winter is actively unhelpful. You would be feeding a plant that is not hungry, which can burn the roots. Put the fertiliser away until spring.
What it needs protection from is the indoor winter climate. Houses develop cold draughts around windows and doors, and dry heat from heaters. Both stress plants. Keep them away from cold draughts, do not let leaves press against a freezing window pane, and do not park a plant directly in front of a heater, where the hot, dry air browns the leaf tips.
This is also the time to be patient with new plants. A plant bought in winter and brought home to a darker, cooler room will take a while to settle, and it may drop a leaf or two while it adjusts. That is normal. Give it the winter to find its feet, and it will reward you with fresh growth in spring.
Repotting, pests and reading a sad plant
Plants cannot tell you in words that something is wrong, so they tell you with their leaves. Learning to read the signs turns you from someone who guesses into someone who knows.
Yellow leaves usually mean one of two things. Too much water, which is the most common cause, especially if the yellow leaves feel soft and mushy. Or, less often, not enough light. Brown, crispy leaf tips usually point to dry air, inconsistent watering, or a plant sitting too close to a heater. Sticky leaves, or fine webbing under the leaves, usually mean a pest such as scale or spider mites, which are common and very treatable.
The fixes are as plain as the symptoms. For yellow leaves from overwatering, back off the water and let the soil dry. For crispy tips, water more consistently and move the plant away from the heater. For pests, wipe the leaves with a damp cloth, and for a more stubborn outbreak, an insecticidal soap from a garden centre, used as the label directs, sorts out most of them.
Repotting sounds intimidating and is actually simple. You know it is time when roots grow out of the bottom of the pot, when water runs straight through without soaking in, or when the plant has clearly outgrown its pot. Choose a pot one size up, one with drainage holes. Gently tip the plant out, loosen the roots a little, sit it in the new pot at the same depth it was before, and fill around it with fresh potting mix. Water it in, then let it settle for a week or two.
Do not repot a struggling plant. If a plant is already stressed from overwatering or pests, repotting adds another shock, so fix the immediate problem first and let the plant recover. Repotting is a refresh for a healthy plant, not a rescue for a sick one.
A boring routine beats enthusiasm
Here is the care rhythm that actually works, and it is deliberately unexciting. Pick one watering day a week and check every plant on that day. Check the soil with your finger, not the calendar, and water only the ones that need it. Dust the leaves now and then, because a dusty leaf cannot catch light properly. And give each plant a quick look while you water, so you catch yellow leaves, pests or a leaning stem early.
The reason this works is that plants reward a boring routine more than enthusiasm. Enthusiasm waters too often, repots too soon, buys fertiliser and moves plants around, and every one of those interventions is a chance to get it wrong. A boring routine checks the soil, waters the ones that need it, and leaves the rest alone. That is what most houseplants actually want.
There is a wider point here worth keeping. A calm, cared-for space, plants included, is part of the same mood-and-home idea as a deep-cleaned and ordered room. You are not just keeping plants alive. You are building a room that feels lived in and looked after, and the plants are the part of it that grows.
Start with one plant. Learn its name, learn its soil, learn how it tells you it is thirsty. When that one is thriving, add another, and let the collection build at its own pace. A windowsill full of healthy plants is not built in an afternoon. It is built one plant at a time, by someone who checks the soil on a Saturday and does not water out of guilt.
Sources:
- Gardening Australia (ABC), Indoor plants and houseplant care
- Australian Institute of Horticulture, General indoor plant guidance (common-name reference)

A reliable hot water system is one of those things you do not appreciate until it stops working. It is behind every shower, load of dishes and wash of laundry, and when it fails, it is rarely convenient. The temptation is to put off repairs and hope the problem sorts itself out. Hot water faults do not sort themselves out. Small issues become bigger ones, and the longer you wait, the more the repair tends to cost.
Hot water units usually give warning signs before they fail completely. Strange noises, slow heating, leaks or water that changes temperature all point to internal wear. Acting early is the difference between a simple repair and an emergency replacement, and this guide covers the signs worth taking seriously.
The warning signs you should not ignore
Some hot water problems are obvious, but many start quietly. Watch for:
- Water that is not heating properly or runs out too quickly
- Rusty or discoloured water coming from the hot taps
- Low hot water pressure
- Unusual banging, popping or hissing sounds from the tank
- Water pooling around the base of the unit
- Sudden increases in your energy bills
Any one of these is worth having checked. A dripping valve today can become a major leak tomorrow, and a unit that is struggling to heat water is working harder and using more energy than it should.
Leaks around the unit need fast attention
A leak is one of the clearest signs that a hot water system needs care. Even a slow drip can damage flooring, walls and nearby fittings over time, and the water has to go somewhere while you decide what to do.
Leaks can come from a few places: a loose pipe connection, a failing valve, a pressure fault or a crack in the tank itself. If the cause is a loose fitting or a worn component, it may be a straightforward repair. If the tank body is corroded and leaking, replacement is usually the smarter option, because a tank that has started to leak will not get better. Either way, delaying only adds water damage to the cost of the fix.
No heat or inconsistent temperature
Nothing gets attention faster than stepping into a cold shower. If the water runs cold too quickly, never heats properly or changes temperature while you are using it, the system needs attention.
The usual causes are a faulty thermostat, a damaged heating element, a problem with the gas burner or a build-up of sediment in the tank. Inconsistent temperature is also a safety issue in its own way. Water that suddenly becomes too hot can point to a thermostat fault, while lukewarm water usually means the system is struggling to do its job. A technician can test the unit and find out which part is actually failing.
Strange noises and falling efficiency
Hot water systems are not meant to be noisy, so when yours starts rumbling, popping or hissing, it is worth listening. These sounds often mean sediment has built up at the bottom of the tank. The unit has to work harder to heat the water through the layer of sediment, which wastes energy and shortens the life of the system.
Older systems also become less efficient as they age. Heating takes longer, the energy bill creeps up and the hot water runs out sooner. None of that feels urgent, but it is the system telling you it is under strain. Catching it early can mean a simple service rather than a premature replacement.
Why fast repairs usually save money
There is a strong financial case for booking a repair at the first sign of trouble. Replacing a valve, thermostat or heating element is far cheaper than paying for an emergency replacement after a total breakdown.
Waiting also adds hidden costs. A struggling system pushes up your electricity or gas bill. A slow leak can cause water damage that costs more than the repair itself. An emergency call-out on a weekend or after hours carries a premium, and a full system failure can leave you without hot water while you wait for a new unit to be installed. In almost every case, the early repair is the cheap option.
Repair or replace: how to decide
Not every fault means the system needs replacing, but age matters. A storage hot water system typically lasts somewhere between ten and fifteen years, depending on the model, the water quality and how well it has been maintained. When a unit is approaching the end of its expected life and repairs are becoming frequent, replacement often offers better value than keeping an old system going.
A good technician will weigh up the age of the system, the cost of the current repair, the overall condition of the tank, the energy efficiency of the unit and whether replacement parts are still available. If the repair is small and the system has years left, repairing makes sense. If the unit is old, inefficient and already failing, you are often better off putting the money towards a new one instead of spending it twice.
Choosing the right person for the job
Hot water systems involve plumbing, pressure and, depending on the model, electricity or gas. That combination means repairs should always be done by a licensed, qualified professional, not a handyman with good intentions.
Look for someone who is licensed and insured, has experience with gas, electric and continuous flow units, gives clear pricing before work starts and responds reasonably quickly when you call. Good reviews and honest advice on whether to repair or replace are also worth looking for. The right technician will tell you when a repair is not worth it, even if that means a smaller job for them.
Preventing future breakdowns
The best way to deal with hot water problems is to avoid them in the first place, and regular maintenance does most of the work. Like any appliance, a hot water system performs better when it is checked and serviced over time.
Simple maintenance includes flushing sediment out of storage tanks, checking the pressure relief valve, looking for rust or corrosion, testing the thermostat and checking fittings for moisture. Most of this is best left to a professional during a periodic service. Households that keep up with it tend to have fewer emergencies and systems that last longer, because worn parts are found before they fail.
Keep the hot water flowing
A hot water system will never pick a convenient time to break down, but you do not have to let it get to that point. The signs are usually there first: a leak, a noise, water that will not heat properly, an energy bill that climbs for no reason.
Treat those signs as what they are, an early warning that a small repair can fix. Book a licensed plumber or hot-water technician while the problem is still small, keep up with the occasional service and replace the unit when an honest assessment says it is time. A little attention now is far cheaper than a cold shower and an emergency call-out later.
Most people renovating a kitchen or bathroom spend months deciding on benchtops, cabinet colours and tiles, then make a rushed choice on the handles. That is a mistake. Cabinet hardware is the jewellery of a room. It is the first thing your fingers touch and one of the last things your eyes land on. Get it right and the whole space clicks. Get it wrong and even expensive cabinetry can look slightly off.
Hardware is a small detail with an outsized effect, and it is one of the easiest ways to lift the look of a room without a big budget. This guide covers the main types, how to match them to your style and the sizing and quality checks that stop you buying the wrong thing.
Why hardware sets the tone for a whole room
Cabinet hardware carries more visual weight than its size suggests. A sleek, elongated bar handle in brushed nickel reads as modern minimalism. A cup pull in aged brass suggests heritage warmth. A ceramic knob with hand-painted detail brings a relaxed, artisan feel. Before anyone registers the cabinetry or the benchtop, the hardware has already set the tone.
That is why choosing it in a rush is such a risk. Hardware is the design detail people touch and see constantly, and it either supports the style you have built or quietly works against it. Decide on the look you are after first, then pick hardware that belongs to that look.
Understanding the main hardware categories
Cabinet hardware is a broader category than most people realise, and the different types suit different jobs.
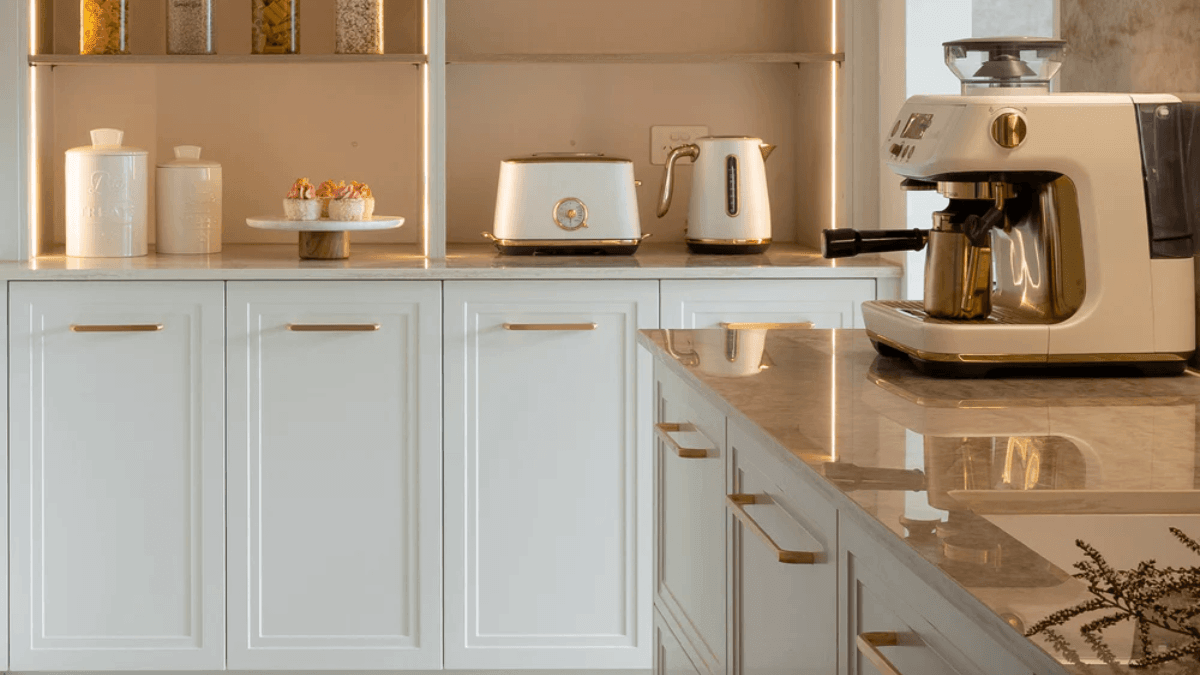
Knobs are compact and decorative, and they work well on smaller drawers or doors where you do not want a handle projecting out. Bar handles, sometimes called D-pulls, are sleek and ergonomic, and they are the default for contemporary and Scandinavian style kitchens. Cup pulls and bin pulls have a vintage feel and suit shaker cabinetry and timber finishes. Edge pulls are discreet and flush mounted, which makes them ideal for handleless, ultra-modern cabinets.
Hinges and drawer runners sit out of sight but matter just as much. Soft-close concealed hinges are now standard in quality cabinetry, while decorative exposed hinges can add character to painted doors. Drawer runners and slides decide how smoothly a drawer opens and how long it lasts, so they are worth paying attention to even though you will never see them.
Matching hardware to your interior style
The finish and form of your hardware should match the broader design language of the space. As a general guide:
- Contemporary and minimalist spaces suit brushed nickel, matte black or chrome bar handles with clean lines.
- Hamptons and coastal interiors work well with polished chrome, white ceramic or brass with soft curves.
- Industrial spaces call for raw iron, gunmetal or blackened steel with angular profiles.
- Farmhouse and country kitchens suit oil-rubbed bronze, antique brass or wrought iron with a worn patina.
- Scandinavian and Japandi styles lean on natural timber pulls, matte finishes and simple geometric forms.
None of these are hard rules, but they give you a starting point. Coordinating the finish across knobs, handles and hinges is what makes a room look considered rather than pieced together.
Getting the sizing right
Even beautiful hardware looks wrong if the proportions are off. A small handle on a wide pantry door looks undersized, and an oversized pull on a narrow spice drawer looks clumsy. Proportions are what make hardware look intentional.
As a rough guide, standard drawers up to about 450mm wide suit a handle in the 96 to 128mm range. Wide drawers of 600mm or more can take a 160 to 256mm bar handle. Tall cabinetry doors balance better with longer vertical pulls of 300mm or more, and knobs generally work best on doors rather than on drawers that get heavy use.
The surest test is physical. Hold the handle against the door or drawer before you commit. It takes thirty seconds and it prevents most of the regret that comes from buying hardware blind.
Quality is in the weight and the finish
Not all hardware is made equal, and the difference between a quality piece and a budget import usually shows within the first year. Look at the weight of the metal, the quality of the plating and how precisely the mounting holes are drilled. Cheap hardware feels light, tarnishes quickly and can loosen or chip under daily use.
Finish durability matters most in a kitchen or bathroom, where hardware sits near sinks and stovetops. PVD-coated finishes last significantly longer than standard electroplated options in those conditions. Heavier hardware generally signals better construction, and it also feels more satisfying to use, which is a small pleasure you will notice every single day.
Practical checks before you buy
A few checks before you order save a lot of frustration later:
- Measure the hole spacing on your drawers and doors first. Most handles use 96mm or 128mm centre-to-centre spacing, but not all of them do, so confirm before you order.
- Order a few extras. Hardware gets damaged during installation, and having spares avoids trying to match a discontinued finish later.
- Ask about samples. A specialist hardware supplier that stocks full collections and offers samples lets you feel the weight and check the finish against your cabinetry before you commit to a bulk order.
- Mix metals with intention. Brass handles with black tapware can look curated when it is done consistently, but inconsistent mixing reads as unfinished.
- Keep the finish consistent across the room. Matching the same finish across knobs, handles and hinges is what pulls a space together.
The small choice that finishes the room
Hardware is one of those decisions that rewards a little patience. It is small, comparatively inexpensive and easy to replace, yet it shapes how a kitchen or bathroom feels every time you use it.
Start with the style you want the room to express, choose the right type for each door and drawer, respect the proportions, and buy the best quality your budget allows. When the handles feel right in the hand and sit right on the cabinet, they stop being a detail you notice and become the quiet finishing touch that makes the whole room look complete.
Moving House Checklist Australia: A Week-by-Week Plan That Misses Nothing

Tick on Dog? What to Do Now, How to Remove It, and When It’s an Emergency

What Fruit Is in Season in Australia This Spring: The Produce Worth Buying Now

The Science Behind Melbourne’s Unpredictable Climate: What’s Really Going On?

Plastic-Free Coffee Makers: Myth or Must-Have?

Zero Waste Toothpaste: What’s Worth the Switch and What to Look For
-
 Melbourne1 year ago
The Science Behind Melbourne’s Unpredictable Climate: What’s Really Going On?
-
Eco Friendly4 years ago
Plastic-Free Coffee Makers: Myth or Must-Have?
-
Eco Friendly4 years ago
Zero Waste Toothpaste: What’s Worth the Switch and What to Look For
-

 Automotive1 year ago
Wet Weather Tyres in Australia: What to Look For and When to Replace Them
-
 Eco Friendly4 years ago
Plastic Free Packaging: How to Keep Your Business Plastic Free
-
 Eco Friendly4 years ago
How Aussie Businesses Can Reduce Plastic Pollution
-
 Home & Garden1 year ago
Boost Productivity and Mood with a Deep Cleaned Space
-

 Food1 year ago
The 9 Best Foods and Drinks to Enjoy Before Bed for Restful Sleep